Search Metzer Farms

December 29, 2017

Mold in Your Feed


We all want good clean feed for our birds, but sometimes mold has a tendency of appearing. Knowing what is dangerous, how to identify it, and how to treat it is a priority should you come across a mold problem in your feed.

The mold itself is not what is harmful to your birds. It is the mycotoxin byproduct that is harmful. It is a microscopic toxin undetectable to the naked eye that is extremely poisonous in very small amounts. Mycotoxins can have adverse affects on your birds including unusual stools, deformed eggs, weight loss, a compromised immune system, lesions on the body and internal organs and just general unthriftiness and poor production. Unfortunately waterfowl are more susceptible to mycotoxins than chickens or turkeys. Therefore, you must be more vigilant in terms of mold.


Mold and their resulting mycotoxins can develop anywhere in the production process of the feed. It can start in the field where the grain is grown and harvested. It can start at the feed mill where the grain is ground and mixed into your feed. It can start while it is sitting on the shelf in your local feed store. It can start where you keep the feed once you buy it. The bottom line is there is no one definitive place your feed can produce mold.

Prevention is the best defense against mold. Mold grows best in damp and dirty areas, therefore, keep your feed in places that are dry and clean. You will have a harder time in humid climates to prevent mold, but it can be done by being diligent in how and where you store your feed.

If you buy your feed sacked, there is not much you can do other than buy from a reputable source, keep it as dry as possible, and use it within a month. You have much more flexibility, however, if your feed is being made for you. Ingredients can be added to absorb mycotoxins or kill mold and you can test your feed for mycotoxins before it is fed.

The most commonly added ingredients are aluminosilicates such as clay and bentonite which bind the mycotoxins allowing them to pass through the bird with minimum absorption. Newer additives include complex indigestible carbohydrates from yeasts. These ingredients must be added during the formulation of the feed to ensure it is uniformly spread throughout the feed. Other ingredients like propionic and other organic acids can prevent the growth of mold and resulting mycotoxins.

Testing of your feed for mycotoxins by sending samples to a lab is recommended if you have a concern. You can also purchase kits that you can use yourself to determine if your feed contains molds or mycotoxins. These kits can be purchased from companies such as Bioo Scientific, Romer Labs, or Charm Sciences Inc. Many of these kits are quick and easy to use to detect common mycotoxins. If you are purchasing truck loads of feed, you can test the feed before accepting it from your supplier.


If you ever find mold growing on your feed, you need to throw away the moldy feed. Otherwise you are taking a great risk in feeding it to your birds. As stated previously, prevention is the best way to deal with a mold issue. Buy from a reputable company that tests for mycotoxins, keep your feed dry and use it within a month.

December 22, 2017

Why Has My Duck Stopped Laying Eggs?


Around mid Autumn we get a lot of questions on egg laying. Many duck owners do not know why their ducks have slowed down or stopped laying all together. The simple answer is that ducks are similar to chickens as laying is heaviest during the spring into summer and starts to decline or even stop during the fall and winter.

Keep in mind that this is for ducks not raised under artificial lighting. Ducks need at least 17 hours of light in order to continuously lay year-round. Without it production drops. If you would like to learn more about ducks under artificial lighting, please read.

Breed and environment are the two main factors when it comes to a duck laying eggs. Some breeds naturally lay more eggs than others. They also require a relatively stress-free environment and adequate day length.

Different breeds can lay a different number of eggs. A Khaki Campbell lays a lot of eggs throughout the year and is even likely to lay year-round. On the other hand, a Mallard does not lay as many eggs and is likely to slow or stop laying come fall and winter.

Stress affects how a duck lays. If a duck is stressed, it will not lay as well. Stress can come from anything such as predators, loud noises, or a change in their environment such as a new feed, animal or person.

Day length is a major factor in how a duck lays as the days start to get shorter in the fall. The longer the day, the longer ducks will lay while shorter days can stop them from laying. This affect is most obviously seen in Northern states that have a drastic difference between their longest and shortest day. In Southern states, however, this change is not as obvious as the time gap between their longest and shortest day is minimal. For example, a duck could lay longer in Florida than the same duck would lay in Alaska.

Bottom line is to not panic when your ducks stop or slow down in laying eggs. Ducks naturally decline in laying as the days get shorter. How much and for how long depends on the breed and their environment. Stress can cause issues with laying and day length affects how long the duck lays.

If you would like to see what kind of duck would be best for egg laying for your needs, we encourage you to visit our website and look at our Duck Breed Comparison chart.

December 15, 2017

How We Make Blown Goose and Duck Eggs


Blown duck and goose eggs can be used to make beautifully decorated egg art. To see examples, see our post on BlownEgg Art.

How the eggs are emptied and cleaned for decorating can differ from person to person. An older method of blowing the eggs is to poke a hole in both ends of the egg, swirl a stick in it to break up the yolk, and literally blow into the egg in one end and the yolk and white goes out the other end - hence the term ‘blown’ egg.

We do not physically blow our duck and goose eggs, however, as we would have fainting employees every day if we did! 
 

We start with a device that helps us mark the exact center of the large end of the egg. We want the hole in the exact center so if the egg is hung from the hole, the egg hangs perfectly straight. The egg is then taken to a Dremel drill and using one of their 192 carving/engraving bits we drill the actual hole which measures 5/32 of an inch in diameter.


The drilled eggs are then placed hole down over short pieces of small copper tubing that are connected to an air compressor and a water source. Initially air is blown into the egg which forces the egg contents out the hole. After the insides are drained, water is then pushed through the copper tube to rinse out any remaining contents. Then we use a soap solution to clean the inside. Finally, we rinse out the soapy water with clean water and use a final blast of air to get all the water out of the egg. 
 

Goose eggs are measured after cleaning. A tape measure is wrapped around the length of the egg, not the width, to determine the size. The eggs are sold by this circumference measurement and range from 8“ to over 12“. A 10“ goose egg, for instance, measures anywhere from 10“ to almost 10.5“ in circumference. Duck eggs, on the other hand, are measured by their weight when they are washed by our automatic egg washer and grader when they enter the hatchery. The duck eggs come in Pee Wee, Small, Medium, Large and Jumbo sizes. As duck eggs are much larger than chicken eggs, our Small is equivalent to a Jumbo chicken egg.


After the egg contents have been removed and the inside of the egg has been cleaned and rinsed, the shell itself is carefully cleaned with a dilute solution of water and vinegar.


Once shiny and clean, the eggs are left to dry and then boxed and stored until a customer places an order for them. If blown and cleaned properly, an egg should never decay. For more information on the blown eggs we sell, please visit our BlownGoose and Duck Egg page on our website.

December 08, 2017

What is Blown Egg Art?


A blown eggs is an egg that has a hole drilled in it and the white and yolk are removed from the egg through the hole. The final result is a hollow egg shell that can be used for decorating. Cultures around the globe have given significant meaning to these decorated eggs; some practical, others ceremonial. Simple to elaborate methods to obtain various designs have been and still are used today. Organizations and guilds continue to further blown egg art, showcasing the intricate designs and encouraging others to follow.

The oldest known use of a blown egg was an ostrich egg in South Africa nearly 26,000 years ago. It is believed they were used as containers for food and water and that the scratches on them designated the egg’s owner.

More recently, blown eggs are used in various religious traditions and practices. For example, elaborate eggs are given as gifts during Easter symbolizing life and rebirth while golden eggs can be found hung as ornaments outside mosques in Istanbul. Decorated eggs in Africa are used to ward off evil while others are used in celebrating the New Year in some Persian cultures. Red eggs are used to symbolize Christ’s blood in some Christian Orthodox and Catholic traditions.

People produced these designs using methods of dying, painting, scratching, and carving. The most elaborate and well known blown egg art is called pysanky. Originating from Eastern Europe, women would use wax to block off areas before dying the egg. Using this same method now, very colorful and intricate patterns and designs can be made.  
Pysanky
Organizations and guilds have been formed dedicating themselves to old and new ways of producing blown egg art. In the US one such organization is the International Egg Art Guild. We encourage you to visit their website for more blown egg art.

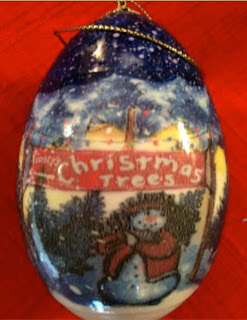
Some individuals make a living making and selling blown egg art. Dan Stevens, our customer in Oregon, has one such business, specializing in Christmas decorations for the last 35 years. Below are a few samples of his work. To see more, visit his website at CountryChristmas Eggs.


If you are a customer of ours and would like your website listed on this or another blog post, please let us know.

Below are some more examples of decorated blown eggs.


December 01, 2017

Ammonia Causes and Effects

Where there are ducks, geese, and other poultry, ammonia gas will be produced and can be harmful to a flock. It is impossible to avoid the production of ammonia, but the harm of concentrated ammonia can be mitigated if preventative measures are taken.


Ammonia gas is produced by the breakdown of uric acid in poultry droppings by bacteria in the litter. When wet, the ammonia production is accelerated and is especially prominent in coops where there is a high percentage of manure in the bedding.


According to the Occupational Health and Safety Administration, people can start to smell ammonia between 5 and 50 parts per million (ppm) depending on how well they can smell. Anything above 25 ppm and the ammonia is now in danger of damaging your bird’s health. Therefore, ammonia can be harming your birds and you don’t even notice it!


Ammonia gas is acidic and can cause serious damage not just to your birds' throat, lungs, and eyes, but your own as well. Ammonia has been known to cause blindness, damage to the esophagus, and death via suffocation. A safe rule is that if you can smell it, you need to do something about it because 1) your birds are breathing that ammonia 24/7 and 2) put your nose 6” above the litter where your birds are. Notice how much stronger it is? A good rule of thumb is if you can stay in the coop while reading a book for an hour with no discomfort, then your birds have a great environment.


You may be thinking, “But I clean my coop every day!”. If you have a small flock, that's great and you should never have an ammonia problem. However, if you don’t have time for this (and we don’t necessarily recommend cleaning every day as the build up of litter allows moisture to travel down through the bedding and away from the surface and reduces total bedding use) there are other very effective ways of controlling the ammonia.

The best thing you can do is make sure that your coop is well ventilated. Many people, especially during winter, like to make their coops airtight in order to keep their birds warmer and to prevent predators from entering, but this can be detrimental to your flock. Openings can instead be covered with hardware cloth or chicken wire which will allow fresh air into the coop. Typically there are more problems caused by lack of ventilation than too much ventilation. Remember – your ducks and geese are designed to swim very comfortably in ice cold water. If you have snow, they will probably prefer to be outside than inside. So provide plenty of ventilation! They can handle it!

What we use!
If you are raising young birds in cold weather and have to limit your ventilation since your heater cannot keep up with the incoming cold air, there are many products to help neutralize existing ammonia that can be sprinkled on the bedding such as DooKashi, Fresh Coop, and CHICK Flic Odor Eliminator. Products such as these can be found at your local feed or pet store. We personally like to sprinkle iron sulfate in our bedding if we have a problem. It is a commercially available granular fertilizer that neutralizes the ammonia and makes your bedding even more valuable as a fertilizer for your garden!

It is important to make sure your ducks and geese are protected from ammonia. It can easily harm your birds but can also be easily controlled with litter removal, ventilation or neutralizers.

If you can read in your coop, you're good.

November 24, 2017

Different Types of Feed - Mash, Crumbles and Pellets


For first-time duckling and gosling owners, going down the feed aisle can be a frustrating experience. We are here to explain the different types of feed form you will encounter. These are only the final forms of the feed – how they are presented to the bird. It tells you nothing about their ingredients or nutritional breakdown.

Mash

Mash is a fine mixture of the ground grains, vitamins, and minerals that an animal needs and has roughly the consistency of corn meal. The benefit of grinding feed to make a mash is that the ingredients are mixed uniformly. If given the choice, the 'good bits' in a feed would be picked out if the feed was not ground, leaving some of the nutrition they need behind. With mash that is not possible.

The downside to mash is that waterfowl have trouble swallowing mash without added water. Therefore their tendency is to take the mash to water, wasting feed in the process and usually leaving quite a bit of feed in the water.

Pellets

Pellets start as a mash that has steam added and is compressed into its pellet form. This means that any bacteria that could have been in the mash is cooked out of the pellet, leaving a nutrient rich and clean feed.


There are many benefits to using pellets. The animal receives all of the nutrients it needs in each mouthful. It is easy for them to eat. Salmonella and any other potential pathogens have been destroyed and …. it is normally easier to pour from a bucket than mash.

Crumble

Between a mash and a pellet is a crumble. A crumble is a pellet that has been broken into smaller pieces, and has the consistency of Grape Nuts breakfast cereal.


Crumbles are typically made for young birds as it is easy for them to eat and it has all the advantages of pellets. But it is also easily eaten by adult waterfowl so do not shy away from an adult bird feed made into crumbles.

Whole and Cracked Grains

Many people like to save money by using predominantly whole or cracked grains for feed. This is cheaper than a commercially made, balanced ration. However, whole and cracked grains do not share the same nutritional advantages that processed feed has. It is like feeding your children only bread, pasta and rice. They also need the vitamins, minerals and proteins from fruits, vegetables, proteins and dairy products. A balanced ration provides all these nutrients in the correct levels. If you simply add a mixture of vitamins and minerals to your whole and cracked grains, it will sift to the bottom and probably not be eaten.

Money Saving Tip

You can use whole and cracked grains as long as it is mixed with a balanced feed – and they are not under eight weeks of age or laying eggs. Our suggestion is that you can substitute up ¼ of your birds’ usual daily feed, but no more as this can imbalance their nutritional intake and cause havoc on their bodies.

When you next go down the feed isle, I will hope you have a better understanding of the purpose and advantages of mash, crumbles and pellets.

November 17, 2017

Treats Your Ducks Will Love!


Whether they are farm animals or pets, treats are enjoyed by all. Ducks are no different. Want to make their day? Listed below are our Top 5 Treats Your Ducks Will Love. After dispensing these treats, you'll believe your ducks are better fed than you are!

Word of Note

Remember, these are treats and should not be a large part of your ducks' daily feed. Doing so can and will unbalance their nutritional intake from their regular feed.

Snails, Bugs and Slugs

Ducks love slugs, snails, flies, earwigs – you name it, they'll eat it. We notice fewer flies in our duck buildings than our goose buildings because ducks chase after them! We have even sold ducks to citrus orchards to keep snails under control. They are especially good at eating mosquitoes, ticks, and other pesky insects, so they double as bug control. If your birds can't go after the bugs, you can always take the bugs to them. Collect all those snails and dump them in the duck pen. They will be gone almost immediately. Or give them purchased treats such as crickets that can be found at many feed and pet stores.

If you really want to give the little guys a treat, worms are a fan favorite. We offer Happy Hen Treats which are freeze-dried meal worms! They slurp them up like spaghetti.

Fruits

Apples and grapes.
Strawberries, blueberries, grapes, bananas, apples, peaches, pears, and other such berries and fruits are amazing treats for your ducks. Make sure to cut them up into bite-sized pieces. Just stay away from the citrus fruits like oranges and lemons.

Melons are also a great treat. I have it on good authority that ducks love watermelon. So when you're having some during the summer, cut a slice for your ducks! They'll love you for it.

Vegetables

Corn, zucchini, and salad.
While vegetables could already be a part of your duck's daily diet, there are a few they especially like. Peas, lettuce, carrots, corn, swiss chard, cucumber, zucchini, leeks, cabbage, and other such green veggies are great treats.

Don't have veggies? Most yard cuttings such as grass and weeds are considered good eats. No need to worry about what to do with dandelions as they will gobble them up along with other edible flowers and weeds you have.

Dairy

Feeding eggs to ducks might seem counter intuitive, but they have a whole bunch of vitamins and proteins from which they can benefit. Give them a hard boiled egg and watch them go at it.

Meats

Beef and turkey cuts.
Meats are rich in protein and, while ducks can eat them, make sure to offer them sparingly. Small pieces of cooked chicken, beef, and pork are excellent little tidbits for them to eat. Fish is, of course, a favorite.

Want to let your ducks have some fun? Release some feeder fish like mosquito fish or tiny minnows into a kiddy pool and let them dive after the critters. Food and exercise at the same time!


November 10, 2017

Getting Ready for Your Ducklings and Goslings: Other Items to Consider


Welcome back to our series of posts to help you get ready BEFORE your ducklings and goslings arrive!

To read our post on the brooder and bedding, go to Getting Ready for Your Ducklings and Goslings: Brooder and Bedding.
To read our post on water and waterers, go to Getting Ready for Your Ducklings and Goslings: Water and Waterer.
To read our post on feed and feeders, go to Getting Ready for Your Ducklings and Goslings: Feed and Feeder.
 
Listed below are items that are not necessary, but are good things to have on hand for when your ducklings and goslings arrive.

Vitamin Packs and Electrolytes

When your ducklings and goslings arrive, they may have been on a rough trip. A vitamin/mineral pack mixed into the water gives them the vitamins and minerals they need for a quicker recovery. Pedialyte is an excellent alternative as it is designed to provide not only the necessary vitamins and minerals but also the necessary sugars and electrolytes. Do not worry about the amount as they can't have too much if you mix it correctly.

Pedialyte
Vitamin Pack
 A vitamin pack is also our go-to whenever there are issues that crop up with the ducklings or goslings, so having one on hand is a good safety net.

Sugar

I know what you're thinking.

Are you suggesting giving sugar to an animal?

Why are you suggesting giving sugar to an animal?

In the past we have suggested adding a small amount of sugar to water, just to help perk them up a bit. We ran an experiment a few years ago, however, and found that those that did not have sugar water actually did better.

However, there are several customers with whom we have spoken, including those that breed and raise birds, and sugar works like a charm for them. Take from that what you will.

If you decide to give them sugar, keep it to a minimum. We suggest about 1/4 cup or less to a quart of water.

Hardboiled Egg

Boil an egg, let it cool, chop it up, and let them at it. The vitamins and minerals in the yolk is what they really need. Chicken eggs are just fine if that is what you have on hand.

November 03, 2017

Getting Ready for Your Ducklings and Goslings: Heating


Welcome back to our series of posts to help you get ready BEFORE your ducklings and goslings arrive!

To read our post on the brooder and bedding, go to Getting Ready for Your Ducklings and Goslings: Brooder and Bedding.

To read our post on water and waterers, go to Getting Ready for Your Ducklings and Goslings: Water and Waterer.

To read our post on feed and feeders, go to Getting Ready for Your Ducklings and Goslings: Feed and Feeder.
 

Heating and Heating Lamp

Ducklings and goslings are vulnerable after hatching and require a source of heat for a period of time. Originally, this was mama duck's job, but as there is no mama duck, you will have to find another source of heat.


Heat lamps are the easiest and most common way of heating your brooder. Here on the farm we use and offer heat lamps with 150 watt bulbs. The hood is aluminum and has a ceramic setting. If you want to find your own bulb, we recommend finding a clear white bulb. You can use a red bulb (infrared), but those are used primarily for chicks to prevent cannibalism which is rarely seen in ducklings.
Heating lamp in our brooder room
Heat lamps can be hung using chains from the ceiling or clamped onto a wall of the brooder. Temperature is controlled by lowering and raising the lamp. In the picture above, we have cut out notches in an aluminum flat bar and attached them to heat lamps to easily move them up and down.

We typically suggest starting at 90-95 degrees Fahrenheit under the heat lamp, but if you live in a warm area you may only need to turn on the lamp at night. It typically takes about a month or so for ducklings and goslings to start growing in their feathers. You can normally shut off supplemental heat within two to three weeks.

Make sure the heat source is off to the side so that they can leave the heat to cool off if they want. The important thing is to observe them. If they start huddling, you know they need more heat. If they stay away from the heat lamp, you can raise or remove it. If they start panting, then they are too warm and you can remove the heat lamp.

Brooder Thermometer

In order to know the temperature of your brooder, we suggest using a thermometer like the one we offer.

Warning!

Heat lamps can be a fire hazard if improperly handled.

Alternatives
If you decide a heat lamp is not for you, you can try a BrinseaEcoGlow Brooder. They make two sizes and Brinsea claims they are safer as they use 12 volt power for heating.


Hot water bottle and knit cover.
For those with no electricity, hot water bottles covered by towels are an effective alternative. Just be sure to switch out the water as the bottles cool, especially during the night.

We encourage you to get creative. There are many different ways of setting up your heat source.

What setup do you use?

October 27, 2017

Getting Ready for Your Ducklings and Goslings: Feed and Feeder


Welcome back to our series of posts to help you get ready BEFORE your ducklings and goslings arrive!

To read our post on the brooder and bedding, go to Getting Ready for Your Ducklings and Goslings: Brooder and Bedding.

To read our post on water and waterers, go to Getting Ready for Your Ducklings and Goslings: Water and Waterer.

Feed

A lot of people, especially first time duck owners, do not know what to feed their ducklings. That's fine though. We're happy to educate those that don't know.


Newly hatched ducklings and goslings need crumble starter feed as shown above which has at least 20% crude protein. Ideally you would find starter feed specifically formulated for waterfowl, but starter feed for chickens is fine so long as it has at least 20% crude protein. Any less and there can be growth problems in the future.

We do offer bags of waterfowl starter feed, but we do suggest visiting your local feed store first as shipping is expensive.

Feeder

Using a chick feeder allows them to get at the food, but not allow them to walk in it. This type of feeder will need to be exchanged for something bigger as they grow.

Feeder elevated on a 2x4. The feeder can be replaced with a shallow dish.
A shallow dish to hold the feed will work fine, but it gives the ducklings and goslings the ability to hop in and make a mess. Raising it up with a brick or block is an option - at least until they are older.

We offer feeders as well, but we still suggest visiting your local feed store first.

October 20, 2017

Getting Ready for Your Ducklings and Goslings: Water and Waterer


Welcome back to our series of posts to help you get ready BEFORE your ducklings and goslings arrive!

To read our post on the brooder and bedding, go to Getting Ready for Your Ducklings and Goslings: Brooder and Bedding.


Water

Water is the source of life. Regardless of when they arrive, make sure to get your baby birds to drinking water ASAP.


Dip their beaks in the water then leave them by the water. Make sure they tilt their head back so you know they drank. They will figure it out from there. Ensure they have access to the water at all times.

Waterer
The best way to provide water is to use a chick waterer. A tank sits on the top and slowly lets water into the small trough that circles the bottom. The trough is just big enough for the ducklings to get their tiny bills into it. They will need something bigger as they grow, but this is a good starting point.

Waterer assembled.
Waterer disassembled.
Some people try to use a shallow dish but this has two problems:
1) the ducklings can get in it and get themselves and their pen very wet.
2) there is not much of reserve of water – you will be repeatedly refilling it.
But if you must use a dish, elevate it with blocks of wood so they cannot walk in it.

Shallow dish on a 2 inch high octagonal piece of wood. The screws are there to keep the dish in place so that the ducklings do not knock it off.
You can also find this or similar at your local feed store. We also offer waterers on our website.